Some people may be intimidated at the thought of using a stainless steel skillet. After all, if you’ve done any browsing online for new cookware, you’ll find plenty of manufacturers of trendy pans, all touting their nonstick qualities, but there are downsides to the nonstick appeal.
First, a nonstick pan gets that way because of the coating that’s been applied to the cooking surface. Those coatings have been found to release toxins when heated, making them a health risk. And even when treated with the utmost care, the coatings will get scratched and abraded over time, increasing the risk of toxic exposure. This also reduces the effectiveness of the nonstick coating, and within a few years you may find yourself having to throw out that expensive pan and replacing it.
Wouldn’t it make more financial sense to invest in quality stainless pans, with no risk of toxicity, that are guaranteed to last a lifetime? That’s what 360 Cookware has to offer you. Let’s look at how you can make a success of cooking with a stainless steel skillet, just like professional chefs!
Before Your First Use
Cleaning
You are going to love opening up the package to find your gleaming new 360 Cookware stainless steel skillet! Before you grab some eggs to try it out, though, you need to wash it to make sure any residue from the manufacturing process is removed. Add about a quarter cup of white vinegar to a sink of warm, soapy water, and wipe it down. Give it a thorough rinsing, and dry it off with a soft cloth.
Seasoning
If you want, you can move straight from there to cooking, but some cooks prefer to season stainless steel in a manner similar to that used for cast iron pans. This process heats up the pan’s surface to open up the pores, and then fills them with oil. When the pan cools down, the surface will now be even smoother and resistant to sticking. This is called polymerization. If you choose to go that route, start by using an oil with a very high smoke point. Olive oil, while great for cooking, isn’t ideal for polymerization. Instead, opt for peanut, sunflower, avocado, beef tallow, or grapeseed oil.
Pour a very thin layer of your oil over the inner surface of your clean, dry stainless steel skillet. Use a paper towel to achieve even coverage and sop up any visible oil. You can then either set it on a burner over medium heat for 10 minutes, or in the oven for an hour at 421° for grapeseed oil or 450° for peanut or sunflower oil. Then leave it to cool completely.
Whether you’ve simply cleaned it or seasoned it, your stainless steel skillet is ready for cooking!
How to Make Your Stainless Steel Skillet Non-Stick
Even cooks who use stainless steel for many cooking tasks may turn to a nonstick pan for frying eggs or sauteing fish, but it’s not necessary to use a fry pan coated with toxins. It’s easy to create a slick surface on stainless steel. for cooking even the most delicate of foods. Let’s learn all about the “mercury ball test”!
The key to creating a nonstick surface, even without seasoning the pan, is to let it sit on a medium to medium-high burner for a few minutes. Don’t add oil or butter! After a couple of minutes, splash a few droplets of water onto the surface. If they bubble up and evaporate, the pan’s not ready yet. Leave it a bit longer, and try the water test again. Once the droplets turn into tiny balls and dance across the surface, the skillet is ready. Add oil or fat, let it heat up, and then you’re ready to cook on a nonstick surface!
Best Cooking Practices for a Stainless Steel Skillet
Keep the following pointers in mind when using a stainless steel skillet:
-
Don’t add food straight from the refrigerator. Give your ingredients about half an hour to come to room temperature before placing them in the pan.
-
Don’t crowd the pan with too much food. Too many pieces added at the same time will lower the temperature of the pan and fat too much, reducing the effectiveness of your tempering to create a nonstick surface.
-
Don’t hurry the cooking process. Give your eggs or fish or steak time to sear properly and develop a crust. Once it has released naturally from the pan, that’s the time to flip it over.
Cleaning a Stainless Steel Skillet
If you’ve preheated your stainless steel skillet properly, you shouldn’t have too much trouble cleaning your pan afterwards. Start by letting the pan cool completely, as filling a hot pan with cool water could lead to warping. Once it’s cooled, wash it in warm, soapy water to remove all traces of food and oil. Dry it with a soft towel. If you prefer, 360 Cookware is dishwasher-safe.
If you do have some caked-on bits, soak the pan in warm, soapy water until things have softened up. Avoid using an abrasive scrubber such as steel wool that might leave cosmetic scratches on the surface. Instead, try a non-abrasive sponge, or a wooden spatula for really tough bits.
Sometimes a cooking session can result in more burnt-on remnants that are resistant to a simple soak. Don’t despair! Sprinkle a generous amount of baking soda over the surface, add water to about halfway up the sides, and then let the mixture boil for a few minutes. Pour the water out, wipe out the now-softened burnt bits, and clean with soap and water.
Over time, stainless steel pans can lose a bit of their luster. Try brightening it up with a wipe of vinegar or some 360 Cookware Stainless Steel Cleaner. If there’s some cooked-on stains, especially on the bottom, you can make a paste of lemon juice and baking soda and gently scrub off the marks with a microfiber cloth. Avoid abrasive commercial cleansers that can leave marks. Followed with a thorough rinse and drying with a soft towel.
Storing Your Stainless Steel Skillet
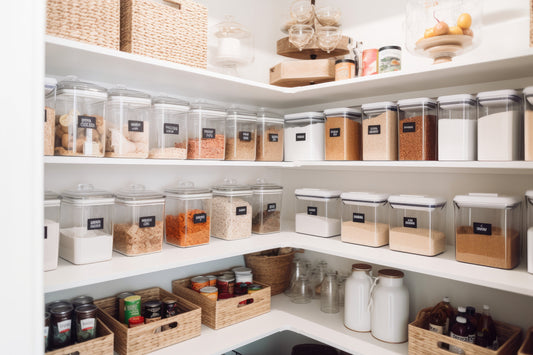
Ideally, you will have a spot to place each piece of stainless steel cookware separately, but the reality of many kitchens is that storage space is limited. If you have to nest pots and pans together in stacks, place a protective silicone pad or soft cloth between each pan to prevent scratching.
A stainless steel skillet is one of the most useful pieces of equipment in any well-appointed kitchen, and with our tips, you can use it with confidence for any cooking task!


